Brief note before you start: if you experience issues while assembling, installing or operating swapmod, please consider joining our swapmod discord server as this is the fastest way to get help from our support moderators or community members. Just click here to get your invitation.
Step 1: Download and print
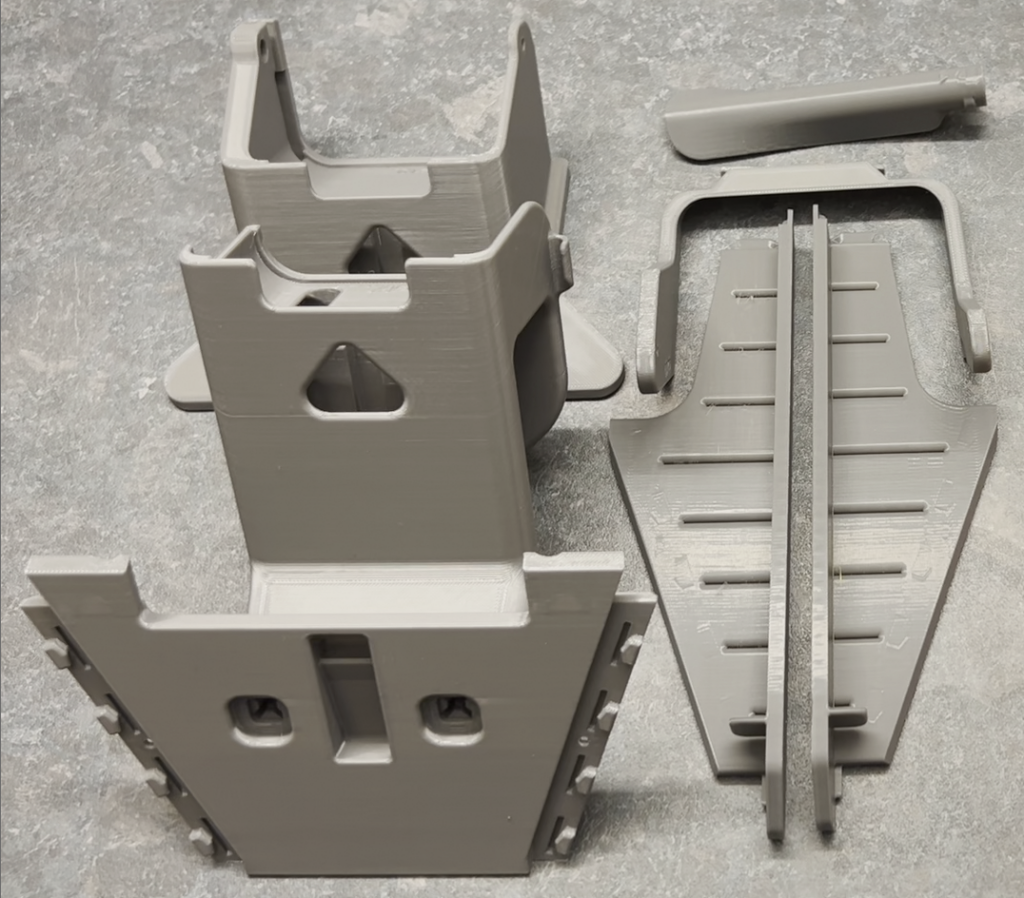
Please download the files linked below and open in Bambu Studio or Orca Slicer. Please note, that all parts should be printed with 0.4mm nozzle!
You can print this six housing parts directly on you A1 mini which will use 3 plates or print it on a larger printer (A1/P1/X1) where all parts can fit onto one plate. It is recommended to use regular PLA (of any brand). Approximately 300g of filament will be needed when printing with original profile. You can also change the printing settings to speed up the print or make it more robust if you like.
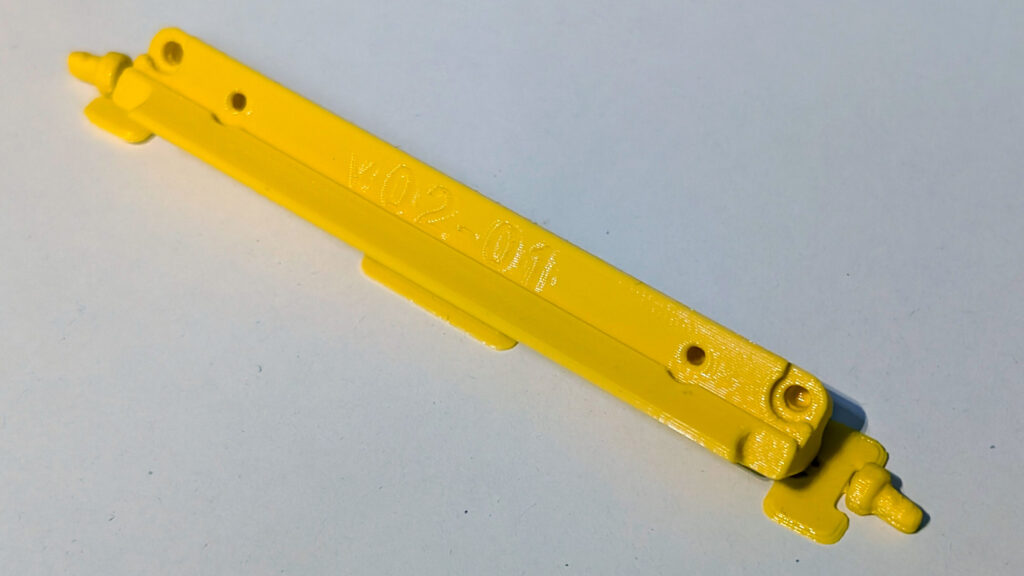
Print this plate hook in needed quantity using a regular PETG. Approximately 11g of filament will be needed.
After all parts contained in the files where printed and exempt from brim (if used) you can proceed with the assembly. Make sure none of these parts are warped or affected by stringing.
Step 2: Assembling swapmod A1M
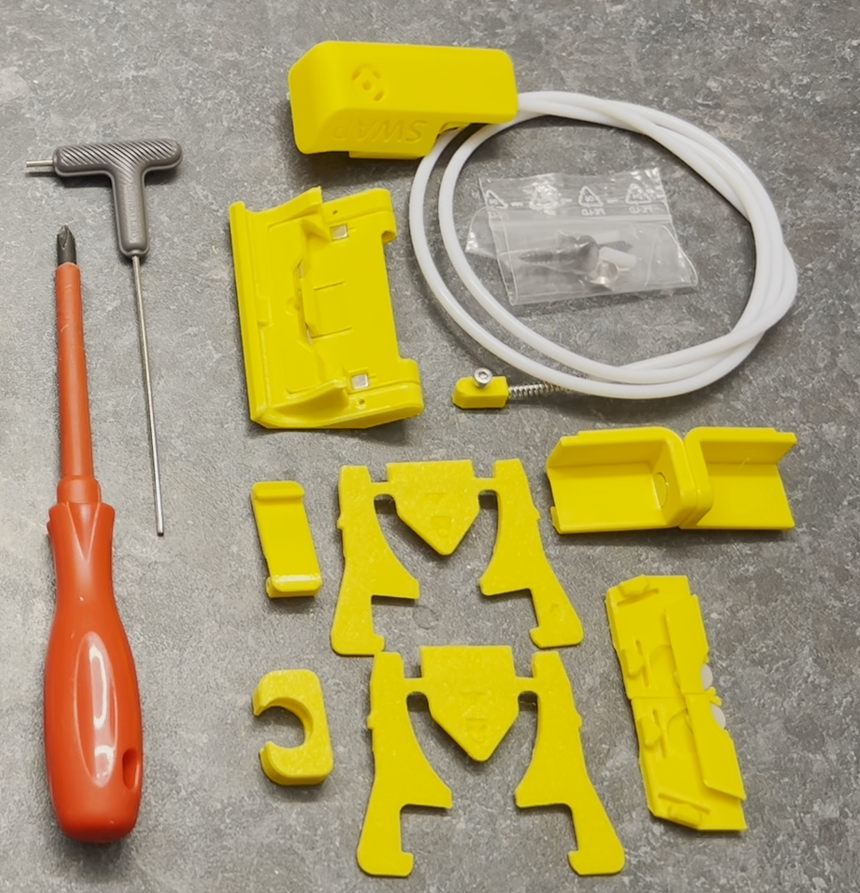
Please check your Kit and make sure none of the parts which should be provided within a kit are missed. Some Kit parts might be updated over time so their appearance can be slightly different. To assemble the kit you would need a 2mm (5/64″) hex key (you can find one in your BambuLab A1 Mini tool-box) and a regular Phillips screwdriver.
Now watch the video and repeat carefully all steps. It’s recommended watching the entire video first to gain an overview, and then watching it again while doing the assembly to follow along with the steps.
Make sure all parts fits well together without applying to much force. Also while fastening the screws you should not apply to much force in order to not accidentally break the threads. Especially when attaching ejector lifter, please make sure it still moving freely, like shown in the video.
Now when you complete with the assembly you can go on with the next guidance step which shows how prepare your build-plates, attach swapmod to your printer, perform a self-test and start using the system.
Step 3: Preparing build plates
In this step you will learn how assemble the hook and attach it to the build plate.

Start with removing the support and brim parts from the hook and detach the two alignment-plug.
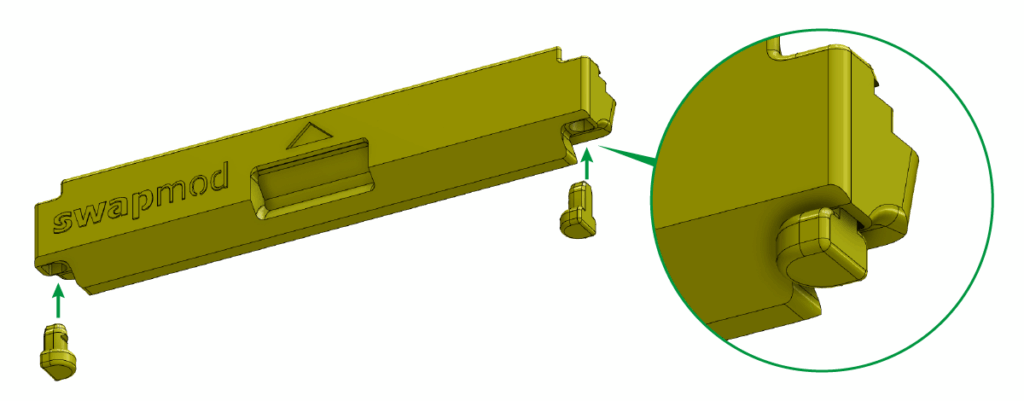
These alignment-plugs needs to be inserted into the corresponding holes located on the bottom sides for the hook. The flat side of the plugs should face outwards.
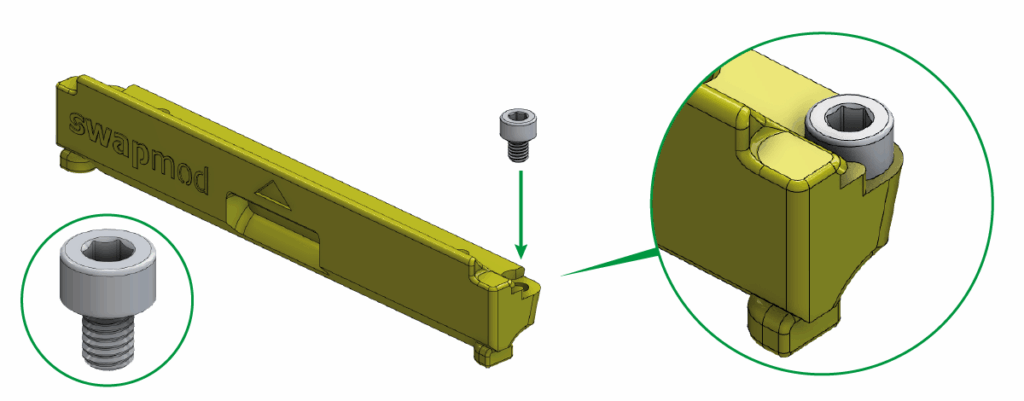
Now take the cylinder head screw and screw it into one outer hole on the top side of the hoock using 2.5mm allen key. Plese do it only on ONE side, left or rihgt, depending on which side of your plate you plan to use.

Attach the hook to the front edge of your panel using the self-tapping Phillips flat head screw.
If you don’t have such screws in your kit, read here…
If you don’t have such screws in your kit, than you have probably the older version of the kit where M2 screws and nuts were used (see picture below).
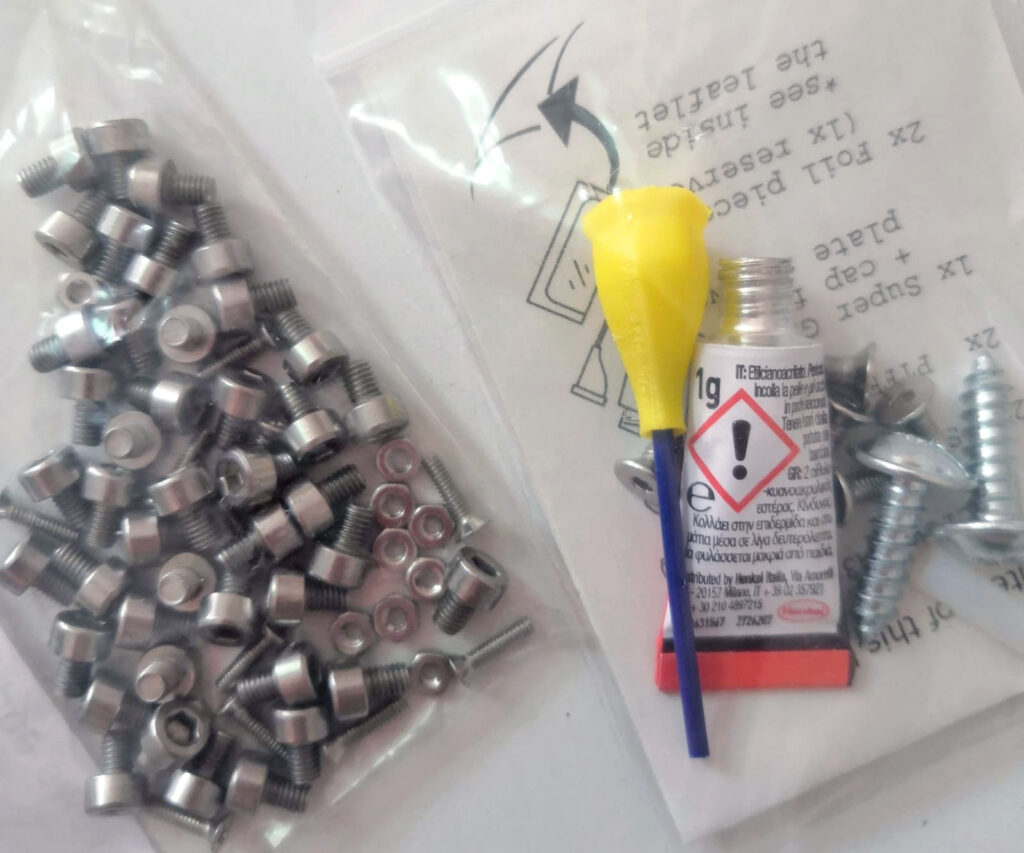
In this case please folow this guide or order some matching screws from BambuLab’s MakerSupply store (here or here) or obtain similar screws from alternative sources.
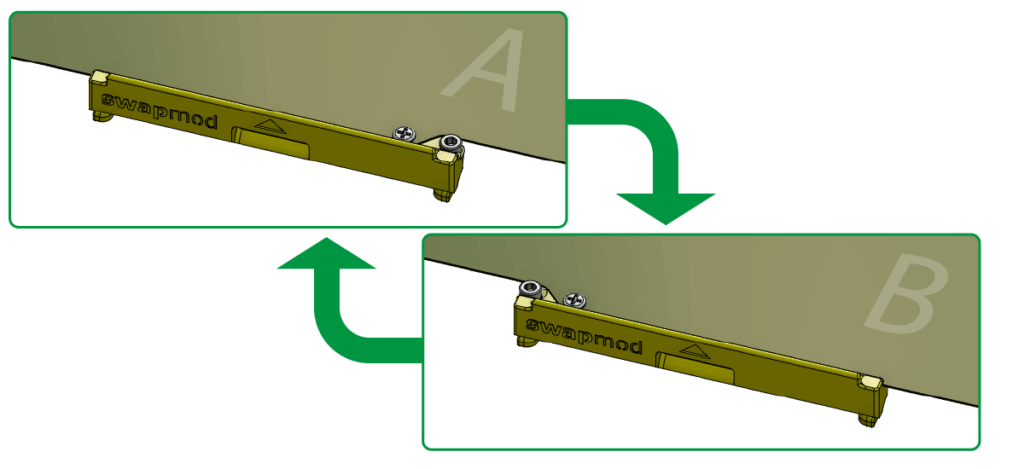
To use the other side of the plate, you need to unscrew the two screws and insert them on the other side of the hook.
Step 4: Installing swapmod
In this step you will learn how to install swapmod on your BambuLab A1 Mini printer.
Please note: as shown in the video, magazine is not firmly bolted to the printer’s housing and can easily be twisted when accidentally bumped. Take this into account and keep an eye on the alignment when the magazine was accidentally moved.
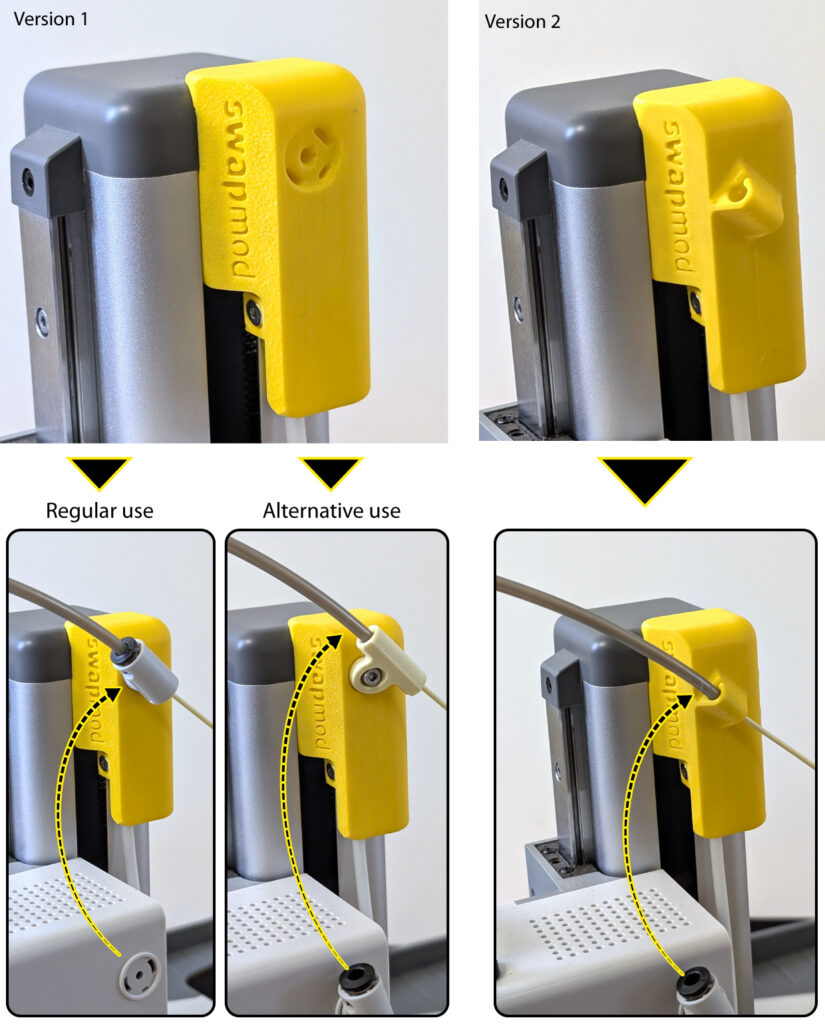
To prevent your filament from tangling while using Swapmod, it is necessary to attach the PTFE tube to a fixed point (e.g. the trigger mount). There are two versions of the trigger mount:
Version 1 is equipped with a slot to attach original tube holder (regular use). If the tube does not hold firmly or the connection wears out over time, an alternative tube holder can be used (download here).
Version 2 comes with an integrated tube holder.
Step 5: Performing self-test
In this step you will learn how to run a self-test of swapmod. It is recommended that this test is carried out after the printer is in place in its actual work area.
If you notice that loaded plates are always slightly rotated (see picture below), this may be due to the misalignment of the magazine.

In this case, you can counteract this by slightly adjusting the magazine’s orientation, as shown in the previous chapter.
Step 6: Using swaplist.app
In this step you will learn how to use swaplist.app to print multi plate projects.
Do NOT use your browser’s auto-translation function.
This will lead to malfunctions of swaplist.app.
Swaplist alternatives
Swaplist.app is our in-house developed low-tech solution which offers an easy understandable way to start with automated printing. However, depending on certain use-case this might possibly be not the best or most comfortable way for everyone. There are multiple alternatives and other possible ways on how you can use an automation. Please follow this link when you want learn more about possible alternatives like swapnow-file or printing-manager services.
You are almost ready…
Your A1 mini is now equipped with swapmod and is ready for use. Please read the following chapter to learn what must be taken into account when using.
If you encounter any problems during the self-test or when using Swapmod, please refer to the troubleshooting section.