Your system is now ready to use. Before you start, please read the following chapter, which will help you set up a workspace for your swapmod system and give you some tips and tricks.
- Place on flat surface
- Avoid jams
- Extensions and mods
- Using SuperTack build-plates
- Rope maintenance
- When not in use
- Join Discord community
- Troubleshooting
Place on flat surface
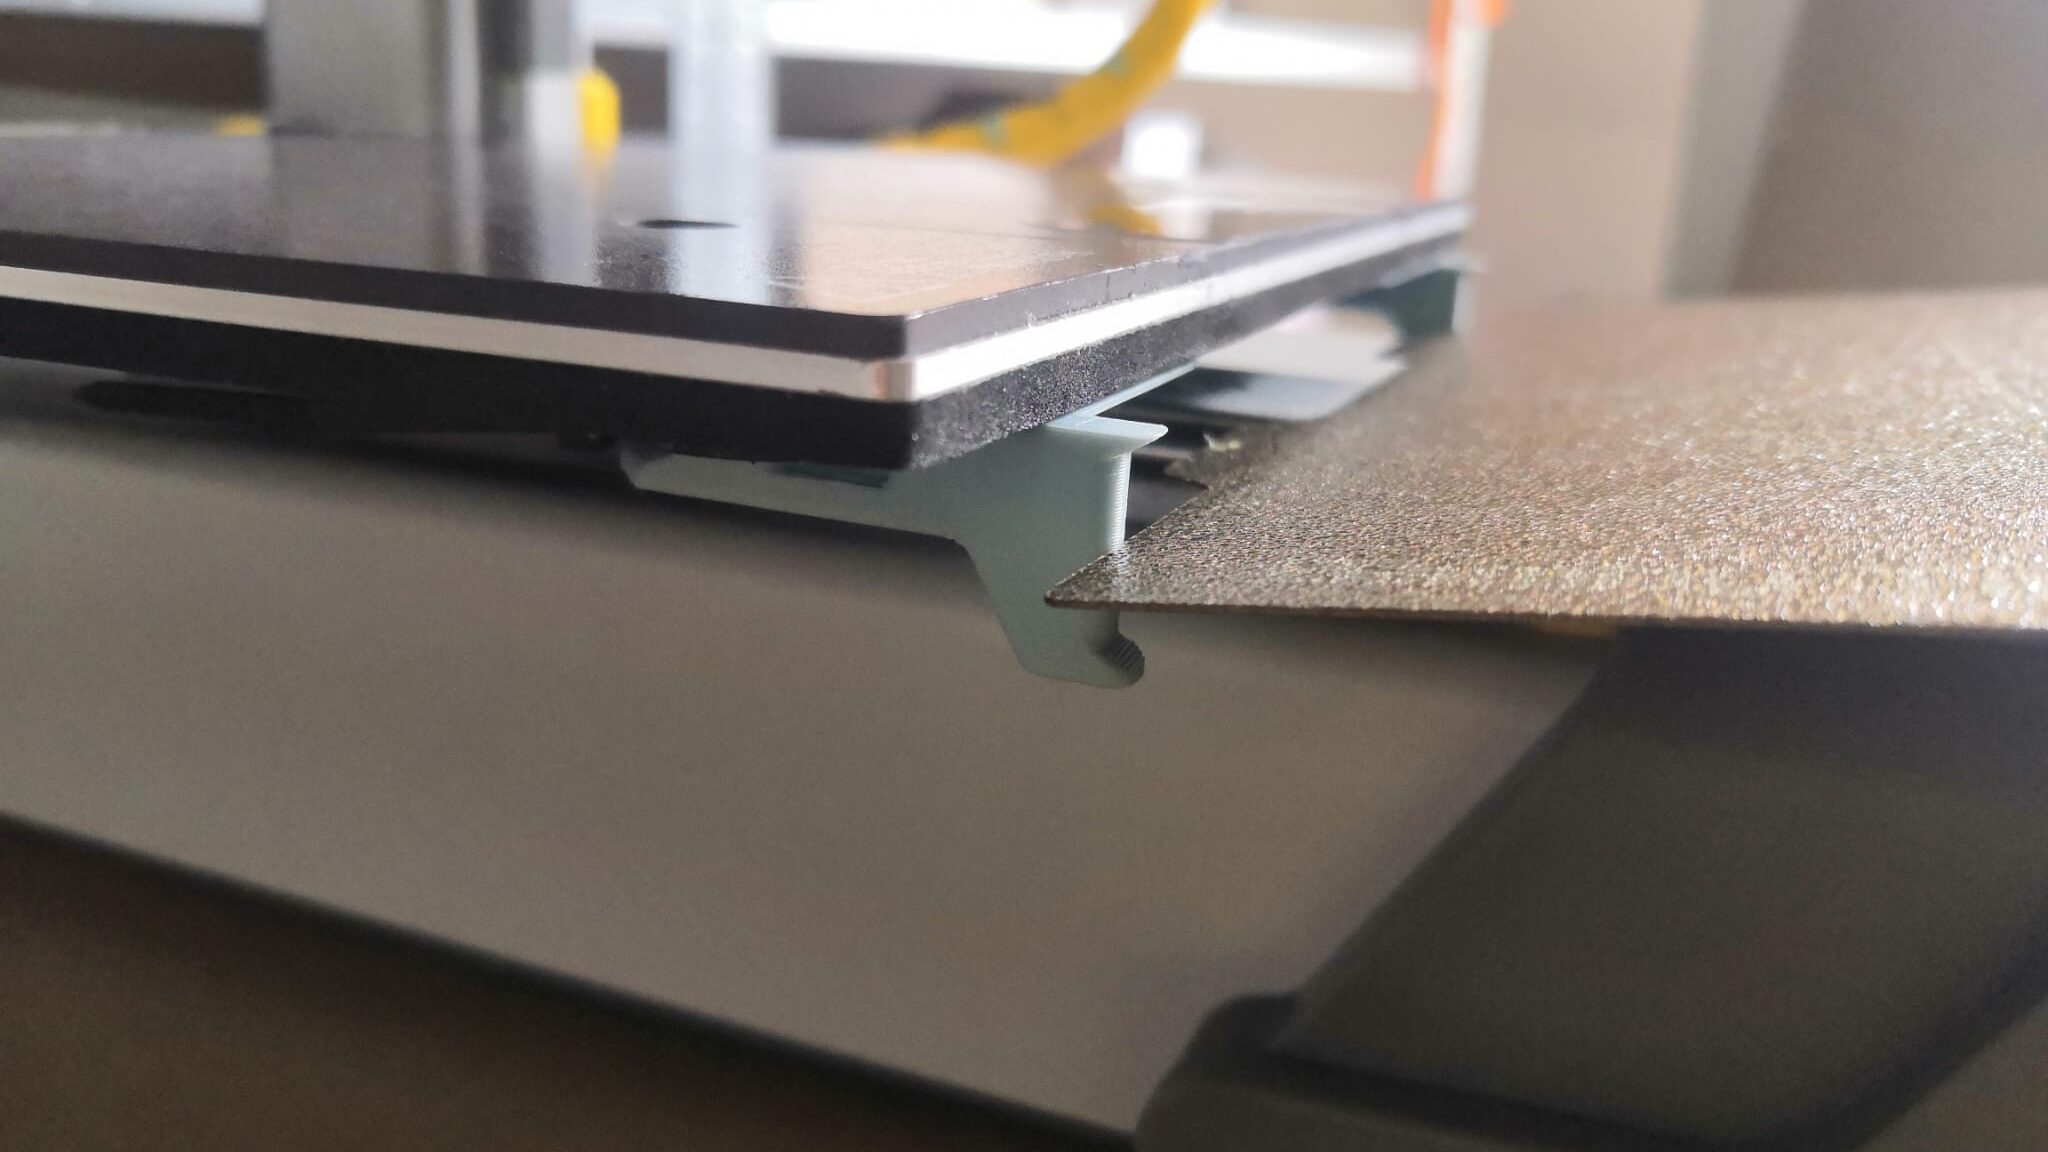
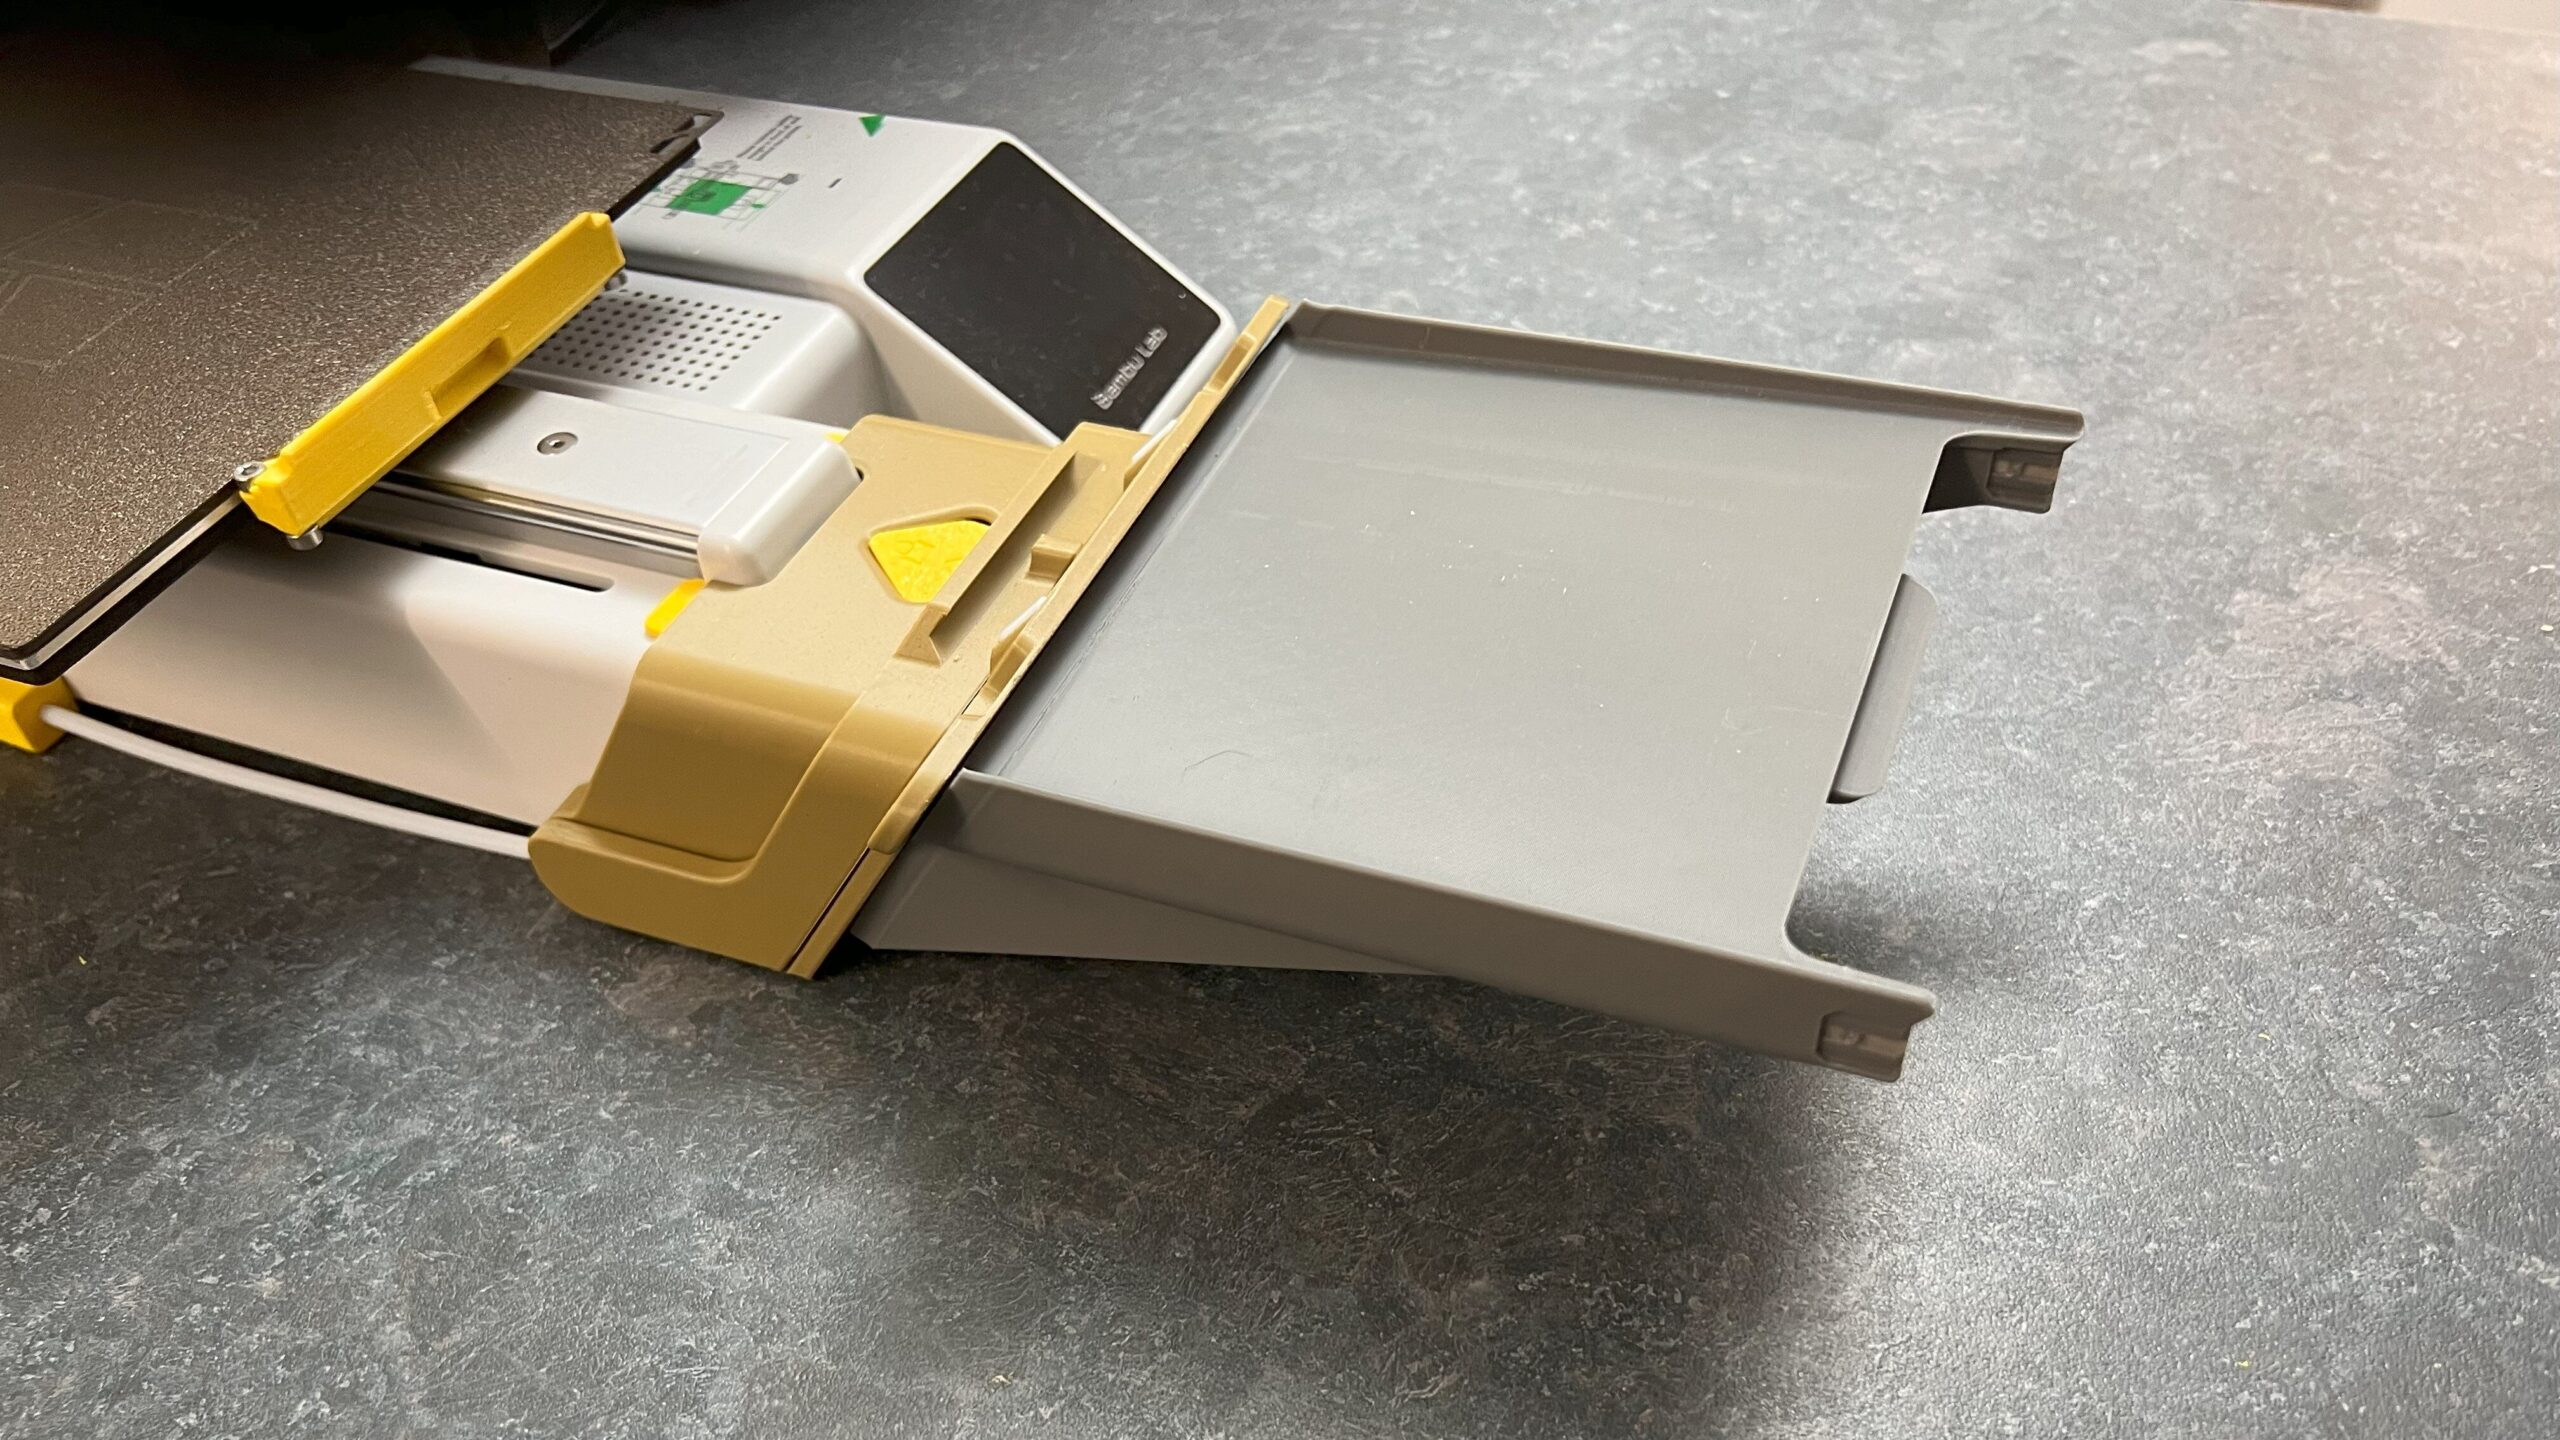
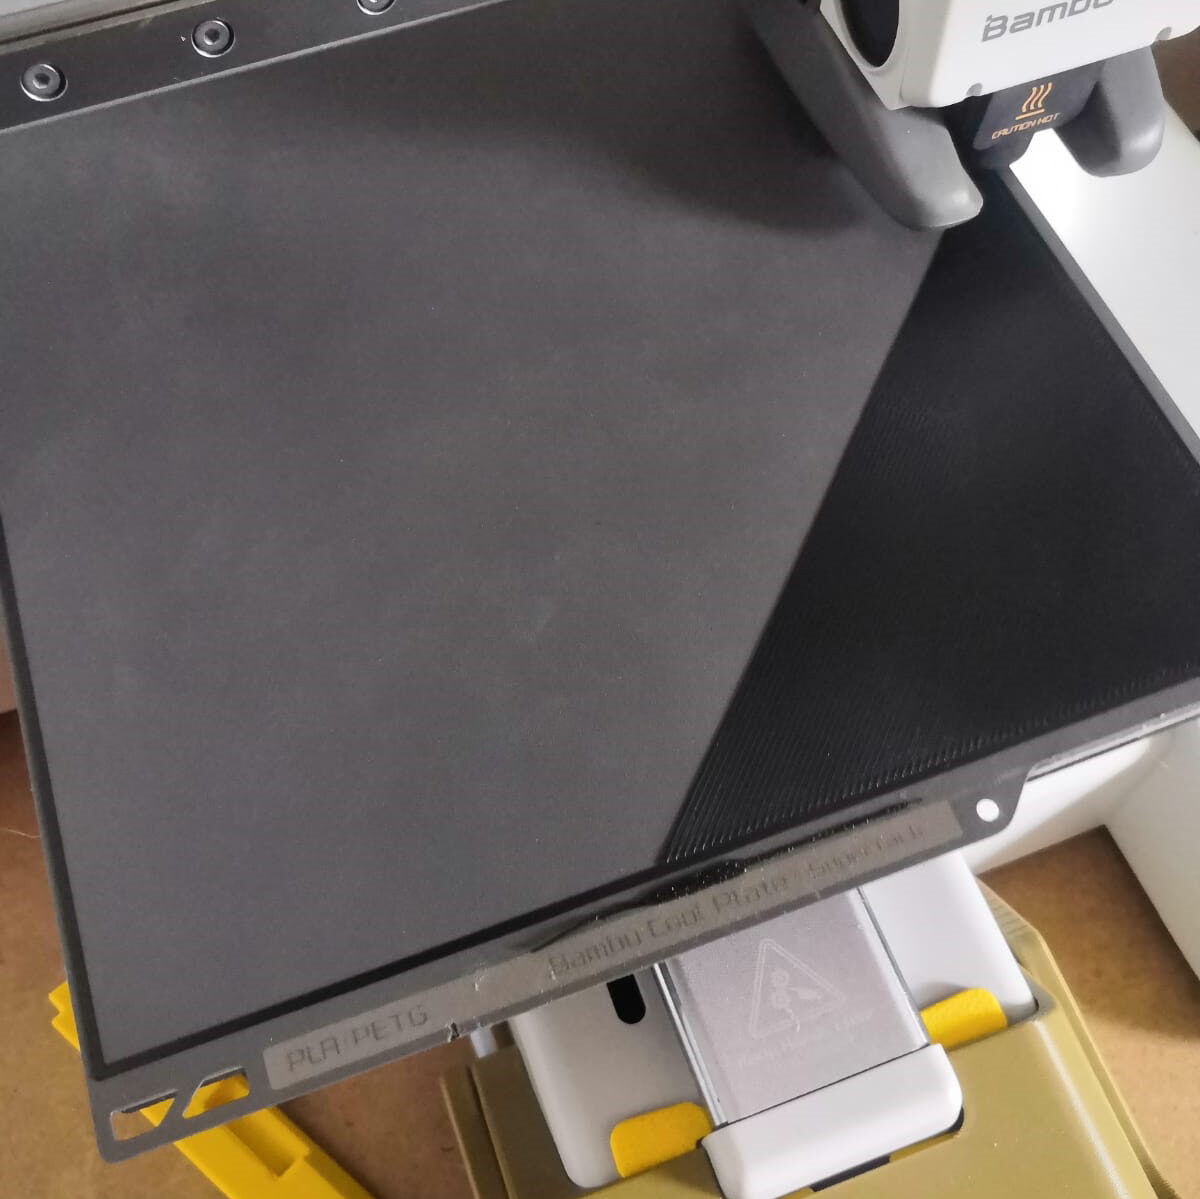
Please make sure that your system (printer and swapmod) is placed on a flat surface. This is very important for the correct operation of the swapmod add-on. As the magazine and ejector units are not firmly mounted to the housing of the printer, their relative heights will vary greatly depending on the surface on which they are placed. There is a margin of tolerance, but it is important to remember that uneven surfaces can cause problems during the loading and unloading process. Here is an illustration of how a concave shelf can affect the setup.
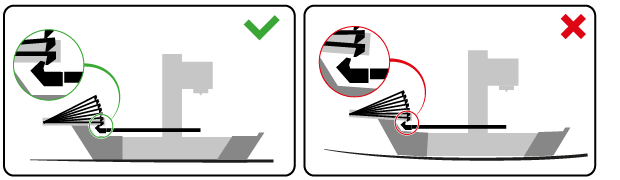
As you can see in the bottom picture, an uneven surface can raise the magazine so that the plate cannot be hooked by the heat-bed gripper.
That doesn’t mean that your “swapmoded” A1 mini has to be placed on a rigid concrete slab from now on. It can actually work on any surface. However, you will need to test your system after placing it on a certain surface to ensure that it still works, and if it does not, take appropriate action (e.g. use underlays or similar).
Update: Starting from 06.12.2025 a new updated version of swapmod housing parts are awailable (Public Parts set v2). This parts will alow more rigid connection to your printer’s housing and are less sensitive to uneven surfaces.
Avoiding jams
You should avoid plate jams at the ejecting unit.
The most esential measure is to use a plate pusher add on (Note: starting from 06.12.2025 a new updated version of plate pusher where added as mandatory part to the regular swapmod Public Parts set v2).
However, it should be noted that a plate pusher alone will not prevent a plate jam entirely. Therefore, further details in your setup should be considered.
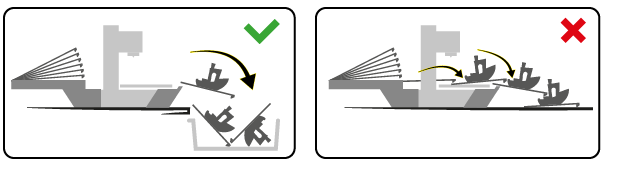
The safest way to operate any plate-changing automation is to use a collecting box placed below the level of your printer. This allows ejected plates to easily fall inside the box and out of the way while the next plate is being ejected.
An alternative would be using a rail system add on.
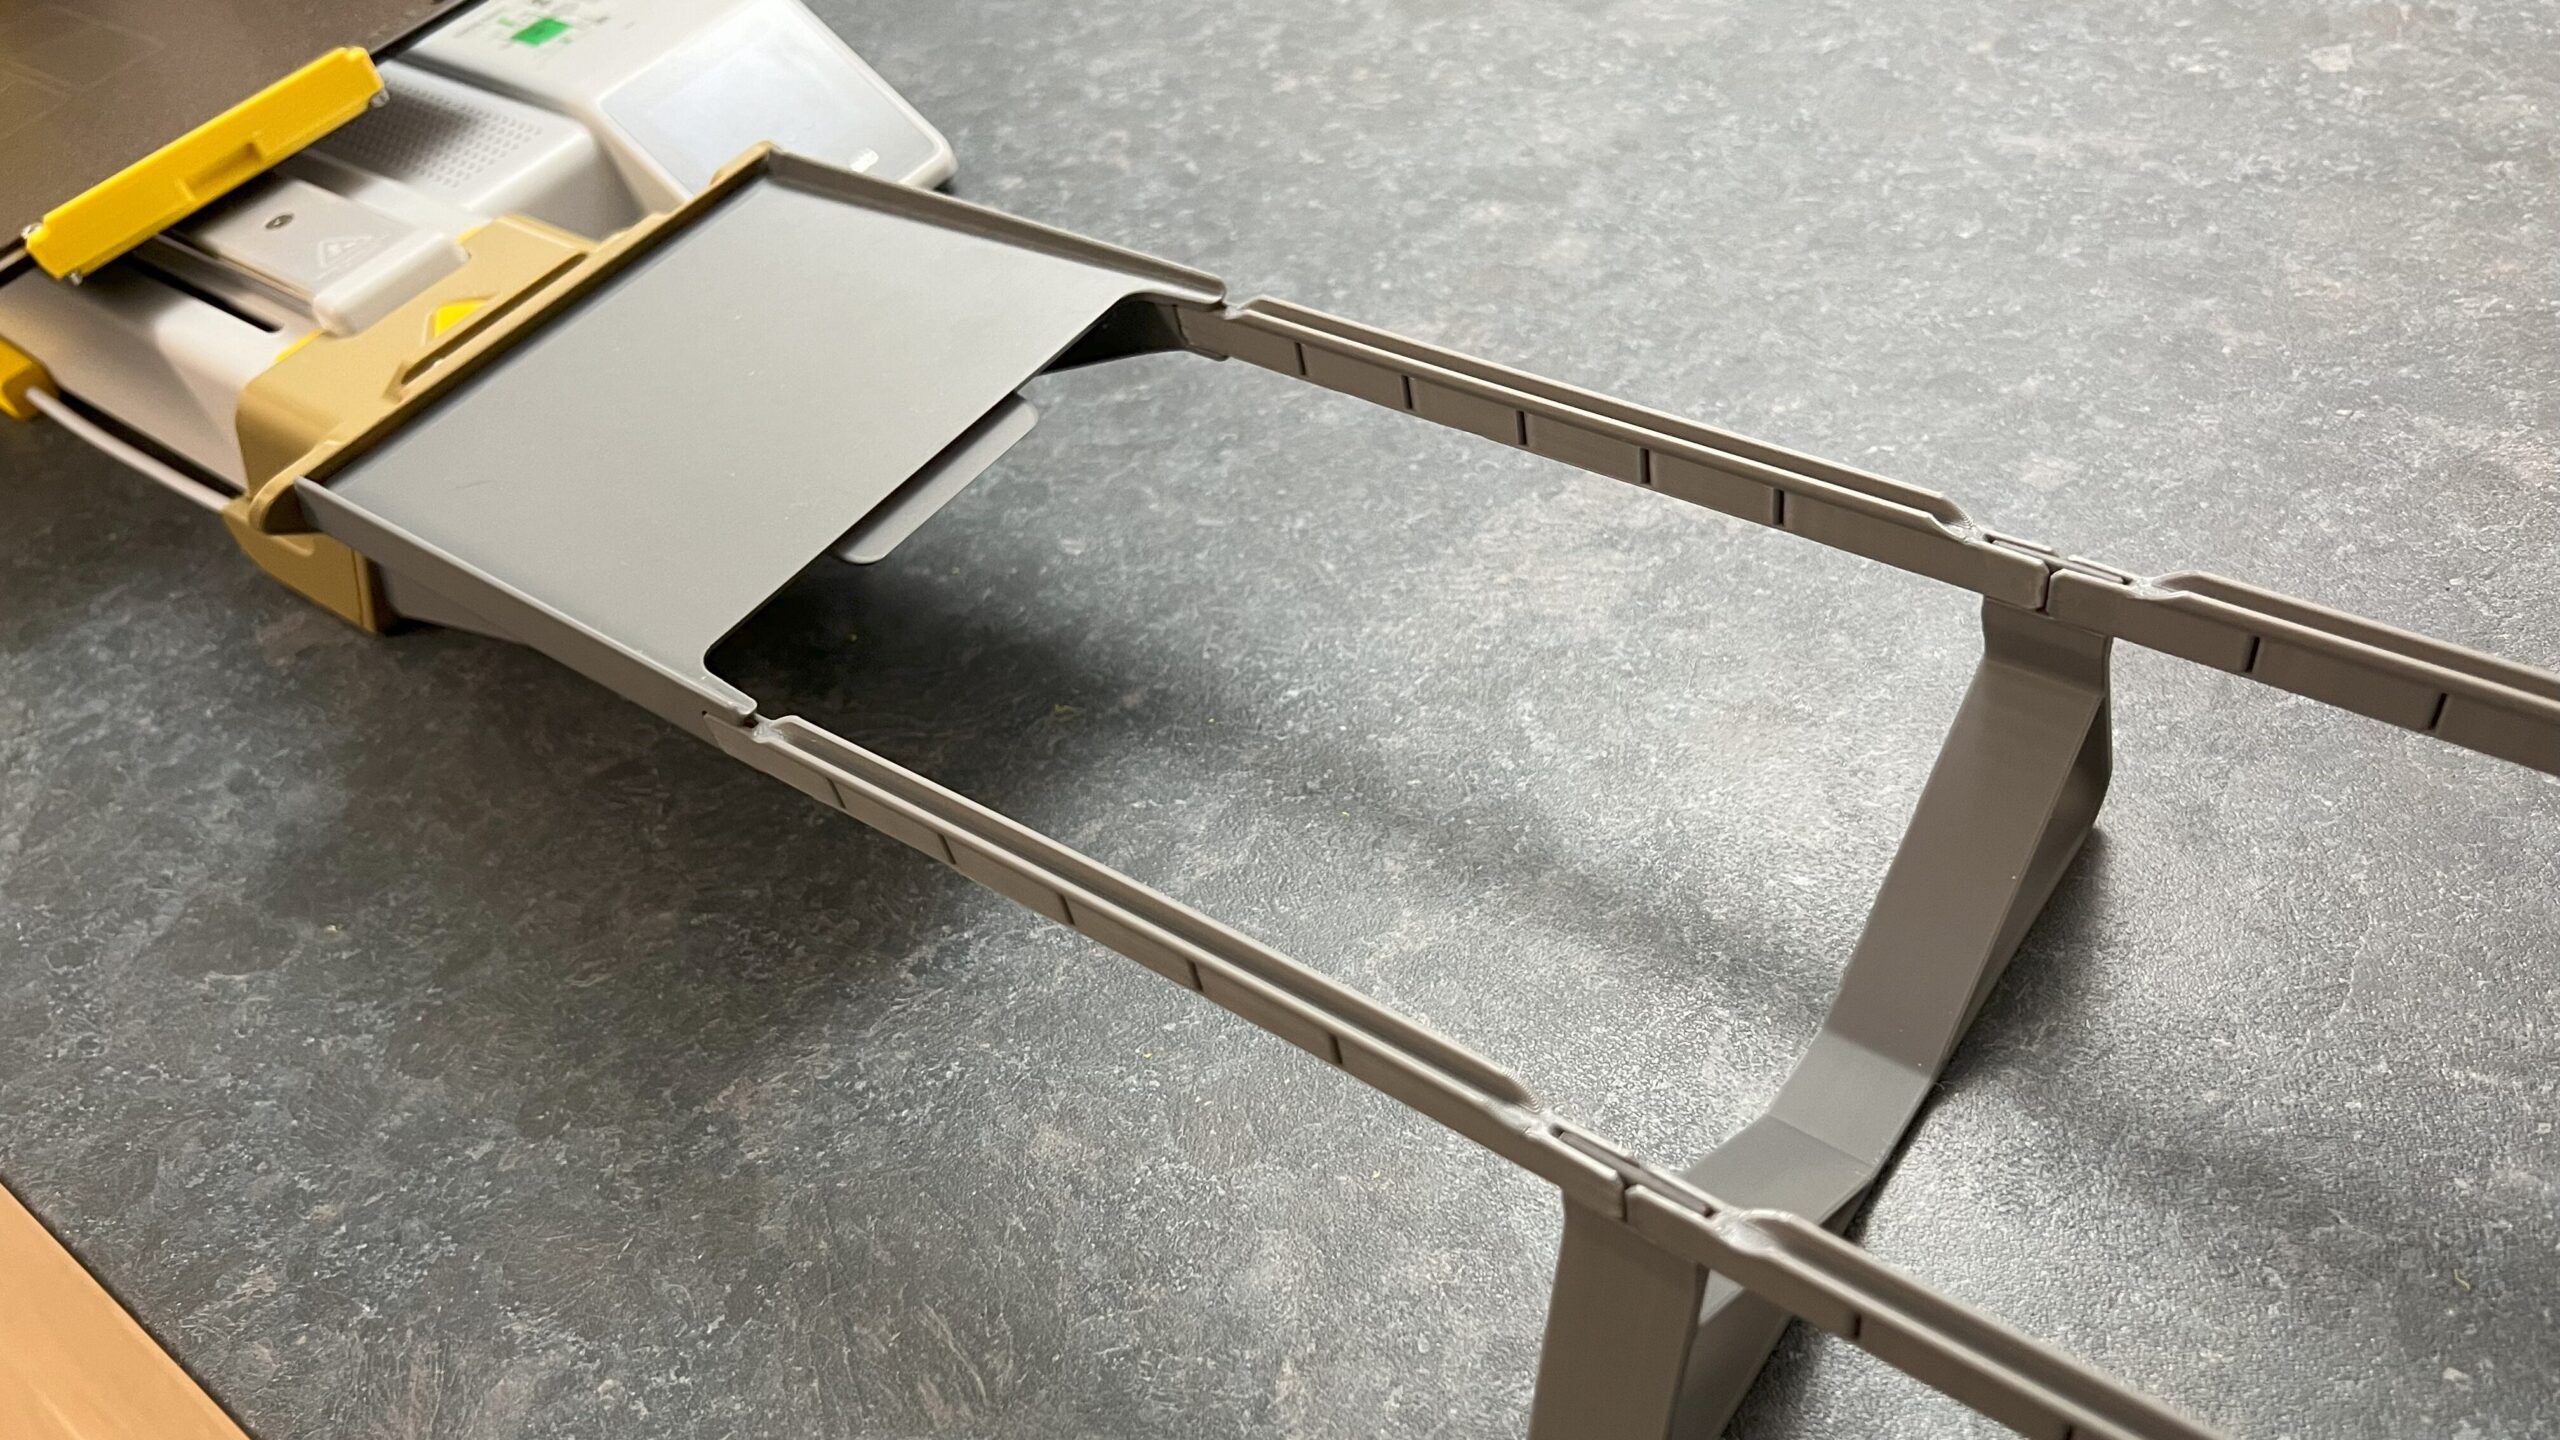
If you are operating within a limited area and neither collecting box nor a rail system are suitable options, please install at least a ramp extender (which is a part of rail system add-on).
This additional part will prevent your ejected plates from causing jams, but only to a certain level. Collecting box is a safer and recomended solution, because in this way ejected plates will less likely cause any trouble.
Extensions and mods for swapmod
The plate pusher and rail system mentioned above are not the only accessories which were designed or adopted for use with swapmod. There is an official collection on makerworld where you will find other models which can be used with swapmod. For instance you can extend the ejector unit with a ramp, so the last ejected plate will remain on it or even use rails if your prefer treat your ejected plates in the most secure and gentle way.
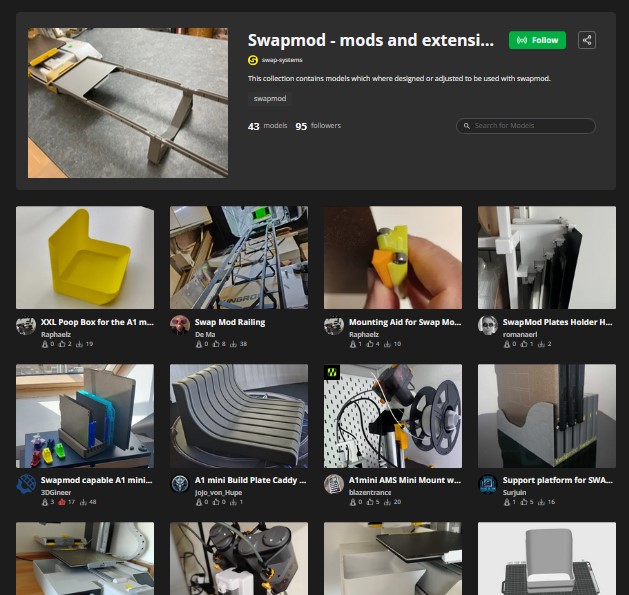
There is also a second collection containing famous third party models, where a swapmod-compatible profile were uploaded. Means if you want using one of these mods with swapmod, you need to look for “swapmod-compatible” printing profile.
Using SuperTack build-plates
BambuLab’s SuperTack plates are very popular for PLA prints. Thanks to it’s special surface the prints sticks reliably and get a nice bottom surface.
Generally speaking, these plates can be used with swapmod. However the rubber like surface of this plates can cause problems while ejecting. The plates needs to slide down from the heat-bed, which can become challengy when high friction force occurs. Therefore it is recommended to print a thin layer of PLA on one side of the plate (0.1 to 0.2 mm).
This will reduce the friction during ejecting process and also preserve the unused bottom side of the plate from been scratched.
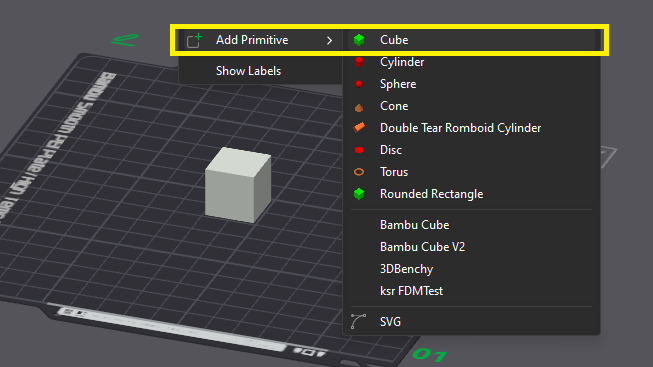
To do this please detach the plate hook if already attached. Place the plate on your heat-bed and prepare . Then open your slicer, add a cube (right click > Add primitive > Cube).
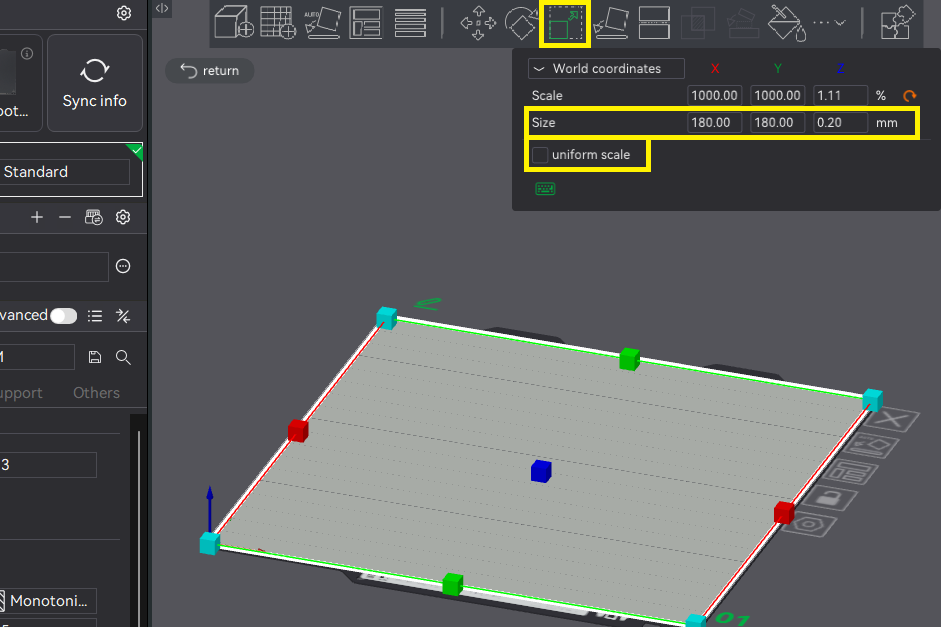
Now select the Cube, click “Scale” icon in the top toolbar, uncheck “uniform scale” and set the size to X=180 Y=180 Z=0.2 and confirm by pressing enter.
Now set the plate type to “smooth” and print the file using regular PLA.
When done, take the plate from the heat-bed, remove the purge line, turn the plate so the coated side is pointing downwards and attach the plate hook.
Update: You can also just use this preset printing file published on MakerWorld by TECstar.
Maintenance of the trigger rope
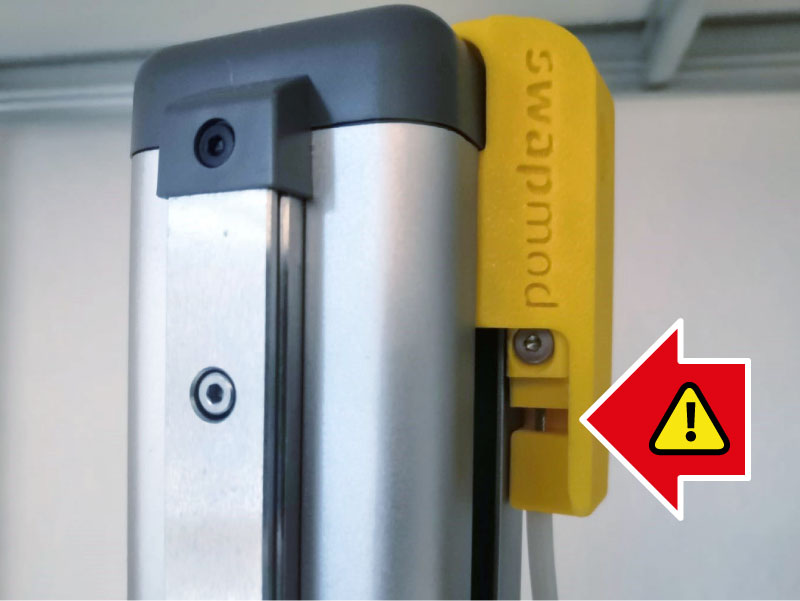
The trigger rope can loose tension over time or may not have been properly tensioned at the time of manufacture!* Loose rope might lead to problems during plate ejection (when the ejector lifter is not rised high enough to “catch” the plate hook).
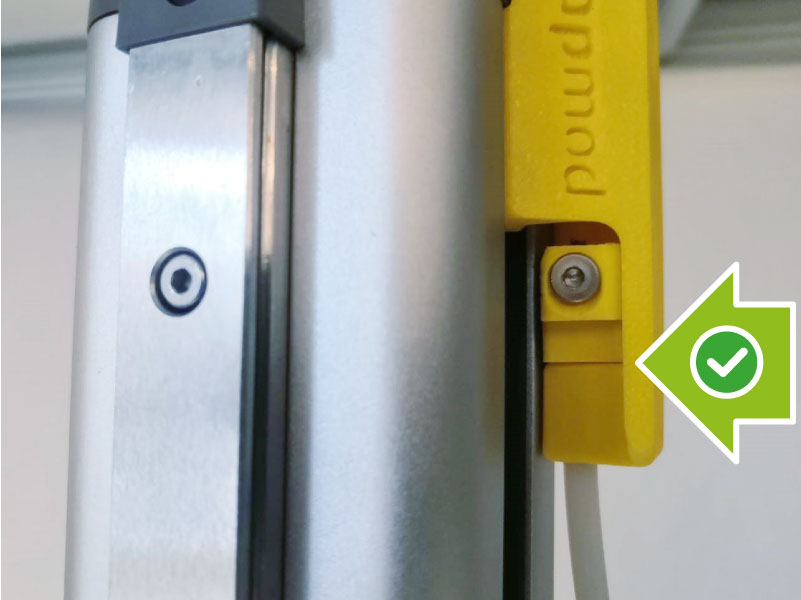
A loose rope can be identified by the gap under the trigger glider (see picture below).
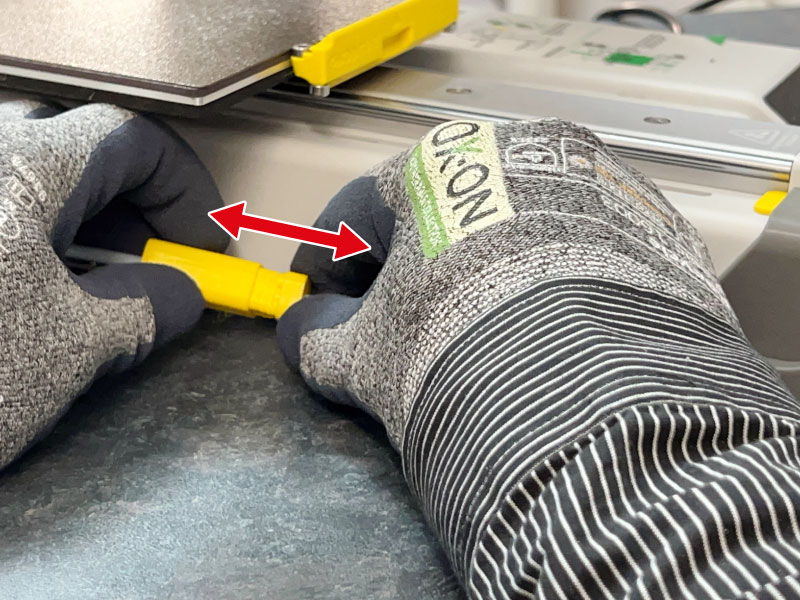
To start tensioning the rope, pull the rope tensioner apart to unlock it (see picture below).
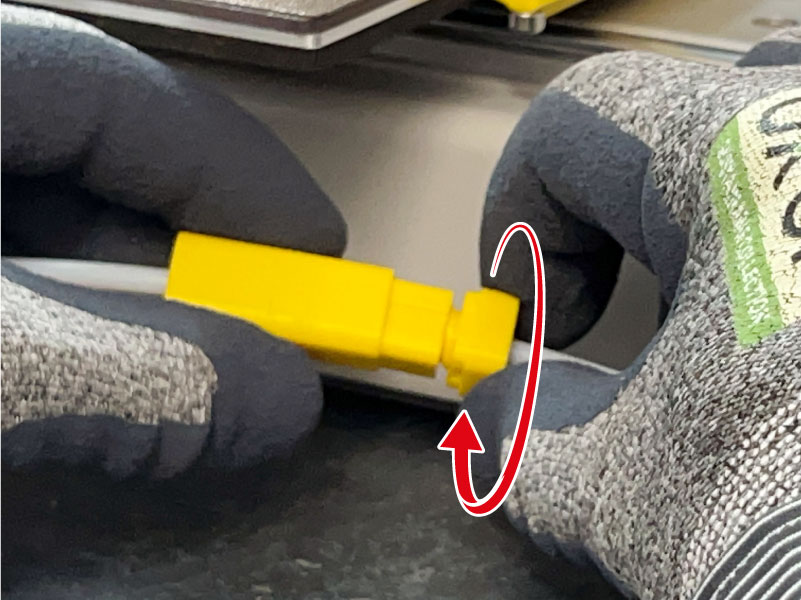
Then turn the screw (see picture above) until the gap under the trigger glider disappears (see picture below) or at least shrinks to less than 1mm.
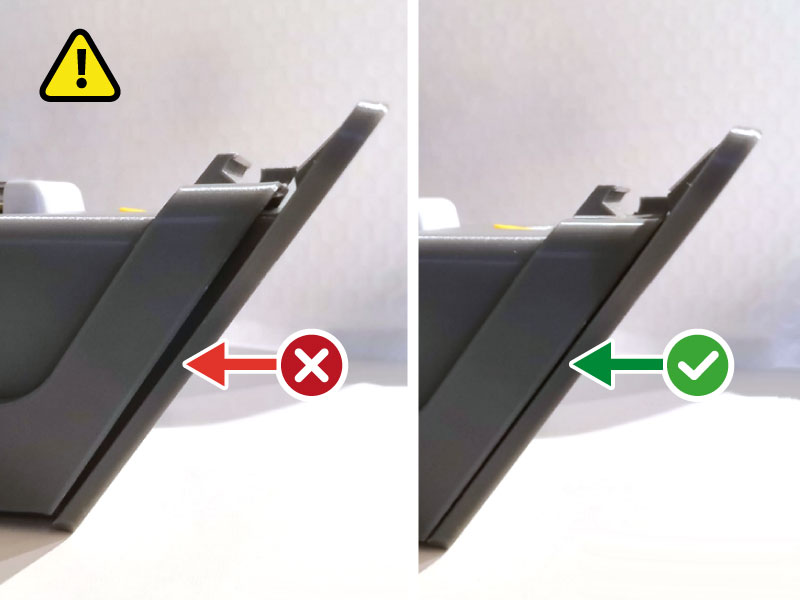
Also make sure that you have NOT over-tightened the rope (see left picture above)! The ejector lifter should stay in a rest position (see right picture above).
*We do our best to check each kit and re-tension the rope if needed. However we noticed that even if the tension is set right during assembling, after first week in the shelf the rope lose some tension anyway. It might happen because the stress goes out of the material. We are investigating this phenomena and look for possible solutions in order to improve our quality management measures. But for now it is recommended checking the tension before first use and keep an eye on it.
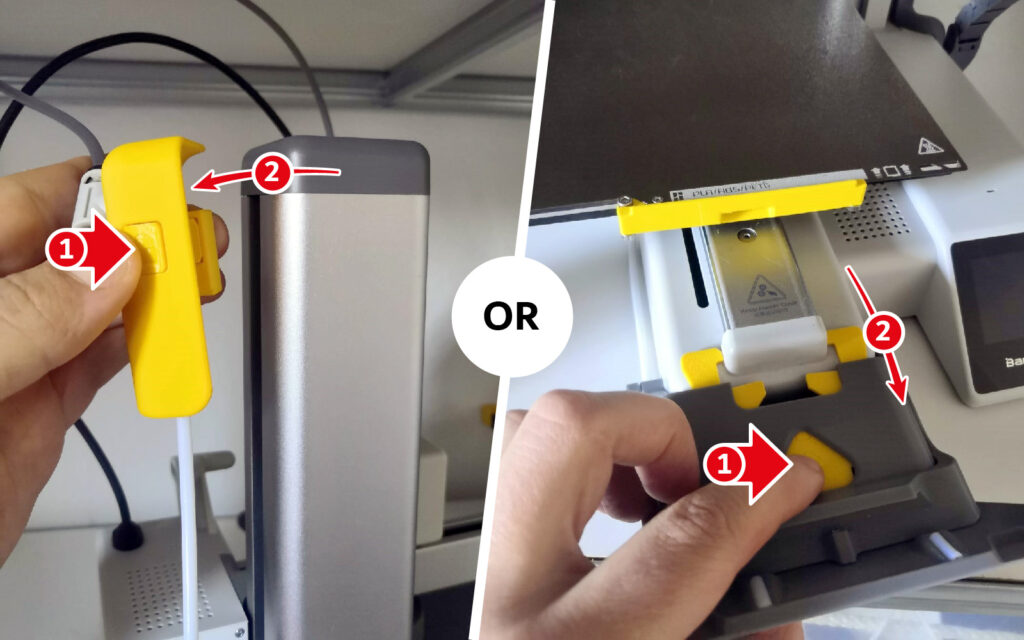
When swapmod is not in use
When you’re not using swapmod (that is, when you’re not printing queue files generated by swaplist.app), it’s recommended that you disconnect the eject trigger from the printer’s z-axis OR the entire ejector unit. Otherwise, your printer may accidentally eject the plate before printing. This happens especially if your printer has previously printed a tall object and you start a new print while the extruder is still in a high position.
Join community
If you would like to stay informed about swapomod and get in touch with developer and community, consider joining our discord server!

Troubleshooting
The most common issues can be avoided by reading this user guidance page from the beginning. Especially the first chapter “Place on flat surface” is usually the answer to 2 of a 3 reported issues. At some point in the future, there will be a dedicated page for troubleshooting.
At the moment the support will mainly be provided at our discord server. This is probably the fastest way to get help, because you will most likely find issues like yours which already have been solved and there is also a chance that you get advice by the community.
If you want go a classic way and contact support via email, you can do so by reaching out to support
swap-systems.com.
Please note, you will not receive any automated confirmation email and it can take few days before you get an answer. If you want share something, please use a cloud service to upload your pictures or video and send a link via email. Please don’t use attachments in your email. It is very likely that emails with attachments will be blocked by our system. Also please take into account that our official support languages are English or German. Emails in other languages will not be answered.
Part’s names reference
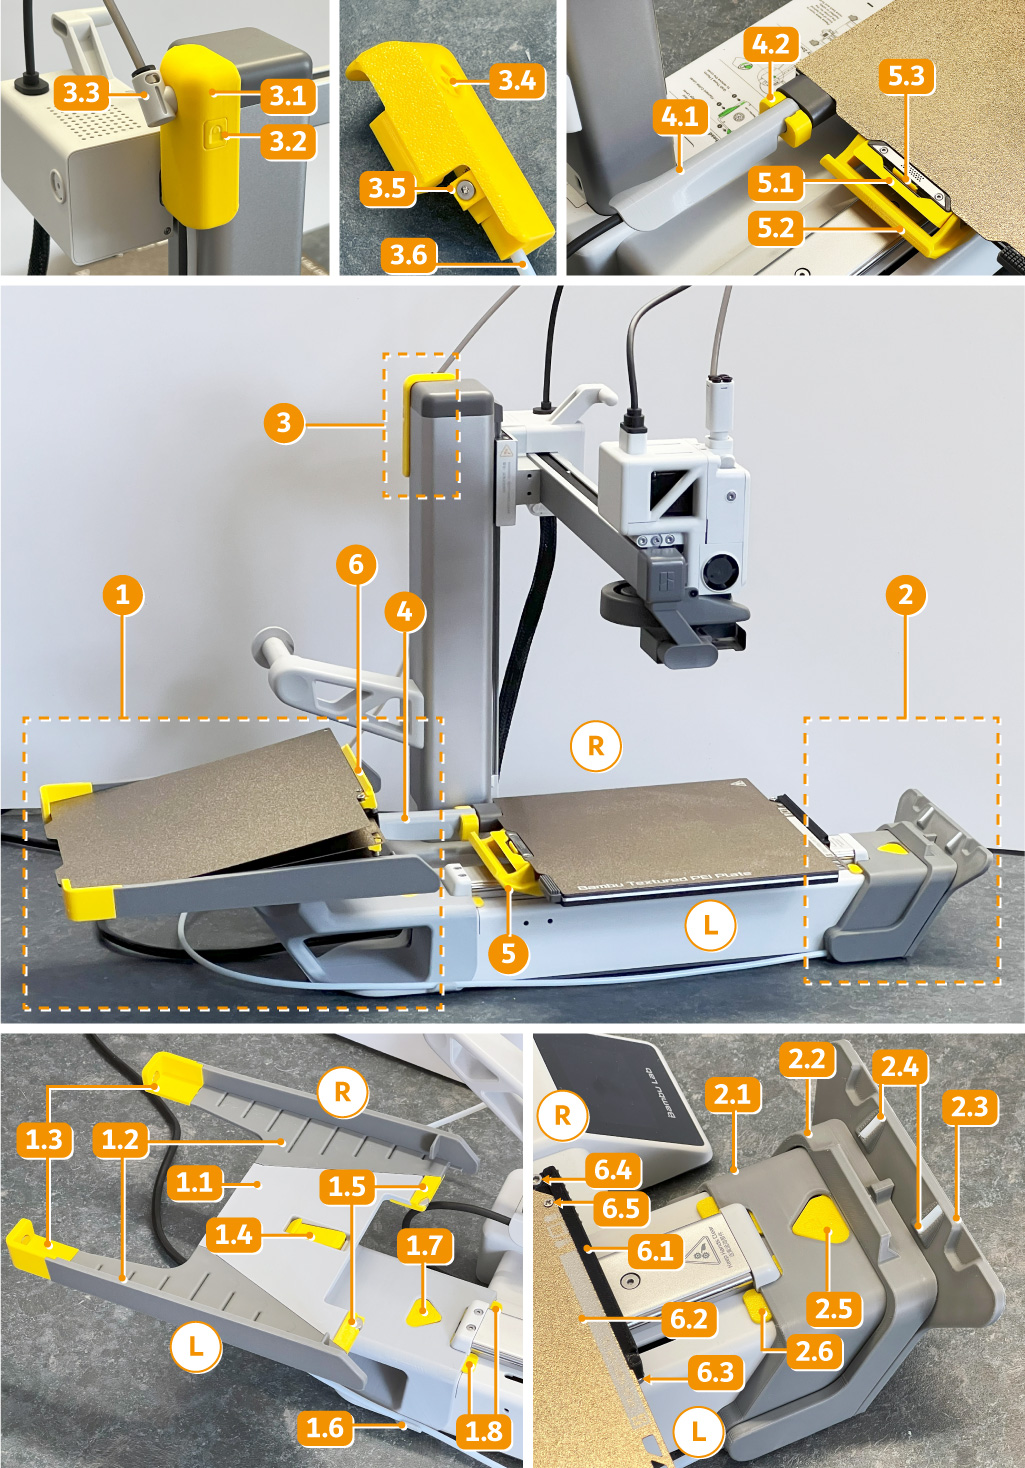
1. Magazine
1.2 Magazine body
1.2 Magazine sides (L/R)
1.3 Magazine rear stop(L/R)
1.4 Magazine middle stop
1.5 Magazine front stop (L/R)
1.6 Magazine tube-holder
1.7 Magazine lock-button
1.8 Magazine lock-gripper
2. Ejector
2.1 Ejector body
2.2 Ejector lifter
2.3 Ejector ramp
2.4 Ejector glider (L/R)
2.5 Ejector lock-button
2.6 Ejector lock-gripper
3. Trigger
3.1 Trigger body
3.2 Trigger lock-button
3.3 Filament-tube holder
3.4 Filament-tube holder slot
3.5 Trigger glider
3.6 Trigger-tube
4 Cable-guide
4.1 Cable-guide body
4.2 Cable-guide lock
5. Gripper
5.1 Gripper body
5.2 Gripper hook
5.3 Gripper snap-lock
6. Plate equipped with hook
6.1 Plate hook
6.2 Build plate
6.3 Plate hook stop screw (L/R)
6.4 Plate hook counter screw
6.5 Plate hook main screw