
Guide for swapmod A2L STL edition
Preparation: Download and print
Begin by downloading the project file in your in your personal download area. To access, login is required. Use same email as for your purchase.
Please note that you will also be able to download new updates and revisions of this file in the future, and update your swapmod if needed.
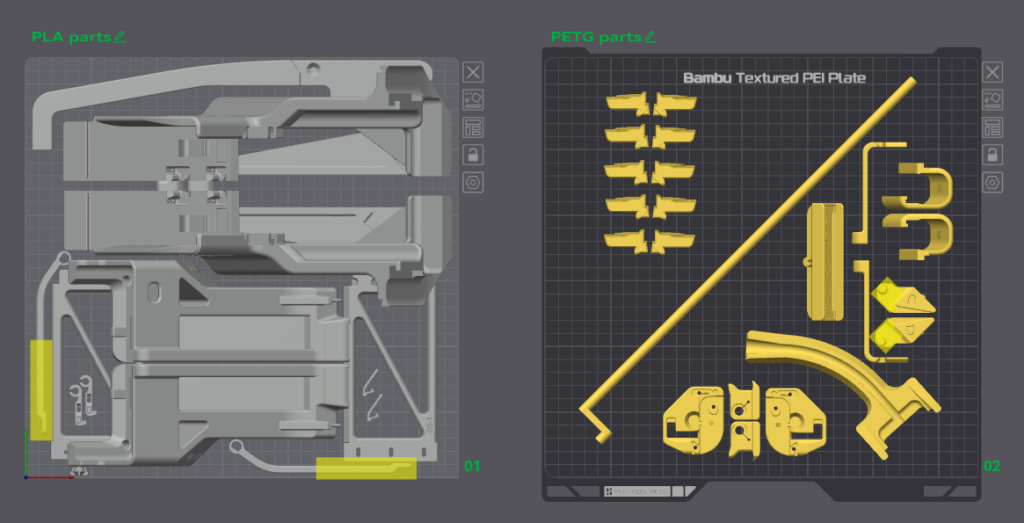
The file can be opened in Bambu Studio or Orca Slicer. While slicing, ignore the “floating regions” warnings, as the parts are using prebuilt support. You will need appr. 900g of PLA and 250g of PETG. It is recommended to use regular PLA and PETG (of any brand) with 0.4mm nozzle. We also recommend to avoid using Silk, Mate, CF or GF filaments as this can cause tolerance issues. For same reason print all parts using PETG is also not recommended. You can change the printing settings to speed up the print or make it more robust, but be aware of possible tolerance issues here, too.
All parts can be printed on A2L which will result in one plate of PLA parts and one plate of PETG parts. On the third plate you will find a pair of plate hooks. Move these to the plate with PETG parts and clone (Strg+K) an amount you need corresponding to number of plates you would like to use. On the last plate you will find the rails which are optional and can also be printed in PLA.
After all parts contained in the file where printed and exempt from brim and support you can proceed with the assembly. Make sure none of these parts are warped or affected by stringing.
Step 1: Assembling
To assemble the parts you would need:
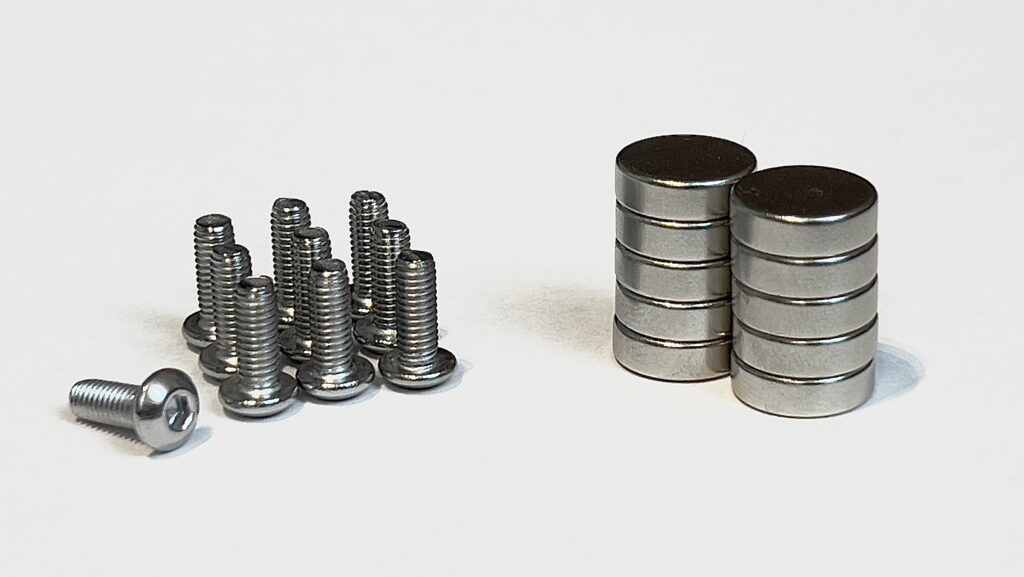
- 10 Round magnets ( diameter: 10mm / high: 3mm)
- 5 Button head screws (ISO 7380-1 / thread: M3 / length: 8mm)
- + 11 more screws for attaching the swapmod parts to your A2L printer
- + 4 additional screws for each build-plate
🛒Where to buy?
You can buy these standard parts from your local hardware supplier. These are affordable and widely available.
If you are located in Germany or at least in one of it’s neighbor countries, you can order a set directly here in our shop.
If you prefer to order it from in BambuLab MakerSulpply store, here are the direct links:
🔧You would also need a 2mm (5/64″) hex key (you can find one in your BambuLab A1 Mini tool-box) and a regular Phillips screwdriver (needed in next chapter) .
▶️Have issues playing the video?
Step 2: Preparing build plates
Please equip each of your plates with a pair of hooks like shown on the picture below. A small triangle-mark serves as an orientation and shows on which side of the plate the hook should be mounted.
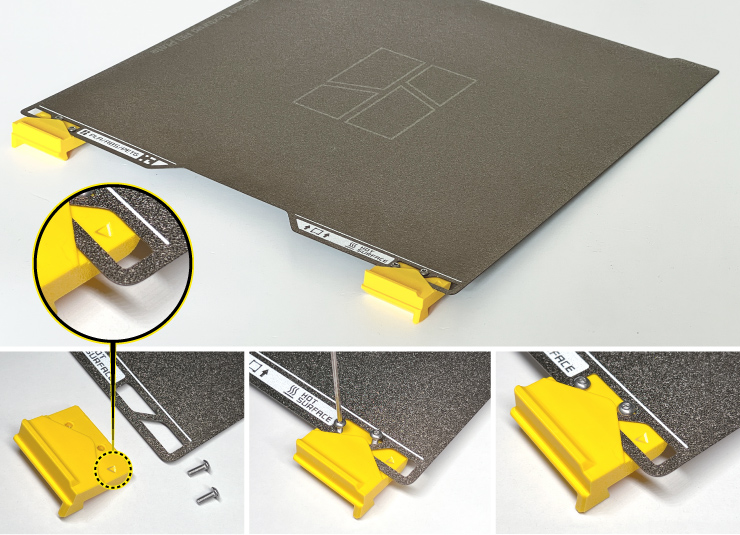
Please note that we tested a system only on original textured PEI plates and some no-name third party plates of a same shape as original. Third party plates are mostly less stiff and steady compared to original BambuLab pates, but usually can be used anyway as long as these are of a same shape as original plates and of a good quality. Thinner plates tend to form a curved surface, which can cause problems during the loading process. If your plate is curved, we recommend turning it so that the convex side is facing upwards (see image below).

Straight (works best and is mostly seen on original BambuLab plates)
Curved with convex side pointing upwards (usually works)
Curved with convex side pointing downwards (will cause serious issues)
SuperTack cool plates where not yet tested! If you would like to use SuperTack plates, you will need to print a thin 0.2mm layer of PLA on one side. The coated side should than be used as a bottom side. The coating will reduce the friction and magnetic attraction make it easier for the printer to eject the plate.
Step 3: Installing
In this step you will learn how to install swapmod on your BambuLab A2L printer.
▶️Have issues playing the video?
Step 4: Self-test
In this step you will learn how to run a self-test of swapmod “STL edition”. It is recommended that this test is carried out after the printer is in place in its actual work area.
▶️Have issues playing the video?
If you have issues to open the self-test file in your slicer and send to you printer, please copy it to your SD card manually. In the next chapter you will find some workarounds for such problems.
🔧How to adjust the magazine and fix a plate alignment issues?
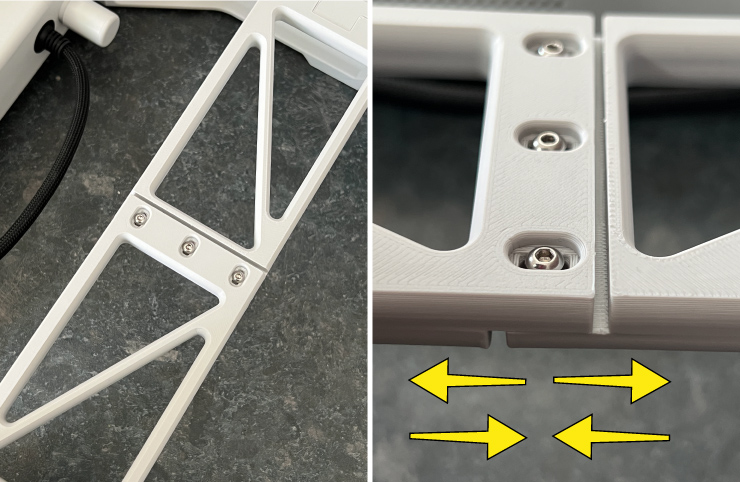
On Swapmod for A2L you can slightly adjust the alignment of the plates using the screws on the sides of the magazine. The protruding screw on one side will push the plate sideways during loading and correct the misalignment.
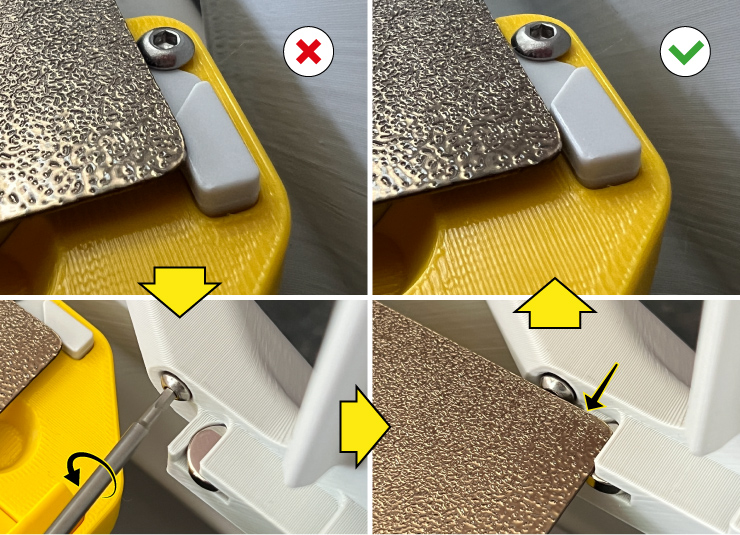
Also the width and rectangularity of the magazine can be slightly modified by adjusting the middle part of the magazine.
Step 5: Swaplist app
In this step you will learn how to use swaplist app to convert your printing files into a printing queue and easily print multi-plate projects. Plese note, this demo video is made on the example of Swapmod for A1 mini, but it’s the same app.
▶️Have issues playing the video?
💾 Can I download this app and use offline?
The Swaplist app for Swapmod STL Edition is not available for offline use. As all original files are shared via a download, we need to keep some control over it’s distribution. However, the app will remain free for customers who have purchased SwapMod files. There will be no subscription-based plan, and after the product lifecycle ends (when we stop selling it), the app will be made publicly available without a login and will be downloadable.
Please note, that swaplist app is only a converter tool, which turns your single-plate files into a multi-plate queue file. Once converted you can use all converted files offline as often as you need. If a 100% offline application is a must have for your business or particular use-case, please consider purchasing swapmod Kit, which comes already with the offline use app.
🚨Have issues reopening file in slicer?
When you notice that the files converted by swaplist.app cause errors when reopening in slicer, try to open your slicer first (without loading file), then switch to preview tab and drag and drop your converted file there.
If this doesn’t work, you have few alternative ways how to send these to your printer even without slicer. Especially when using MacOS, OrcaSlicer or processing big files (with many plates or complex geometry) this could be helpful.
- Setup and use FTP connection to send your files
- Install and use BambuConnect to send your files
- Install and setup Bambu Farm Manager
- or simply copy files manually to your SD (which is possible but not recommended for frequent use)
- Use some third party printer manager (read also below)
🚨Have issues converting large files?
⚠️Note: It is recommended to use Firefox browser when you plan to convert large project files. Firefox has higher limits for memory usage (compared to other browsers like Safari or Chrome for instance).
Swaplist app is our in-house developed low-tech solution which offers an easy understandable way to start with automated printing. However, depending on certain use-case this might possibly be not the best or most comfortable way for everyone. There are multiple alternatives and other possible ways on how you can use an automation. Please follow this link to learn more about possible alternatives like swapnow-file or printing-management tools and services.
Step 6. Using swapmod
Your system is now ready to use. Before you start, please read the following chapter, which will help you set up a workspace for your swapmod system and give you some useful advices.
Troubleshooting and community
If you experience issues while assembling, installing or operating swapmod, please consider joining our swapmod discord server as this is the only way to get help from our support moderators or community members. Just click on the button below to join. This is also the only channel for now where you can be notified about design updates and announcements.

Amount of plates in the magazine
As the system is not yet tested with a large amount of plates, we recommend you to not use more than 6 plates at the beginning. You can increase amount to 8 and more, once you got familiar with the system.
Avoiding jams
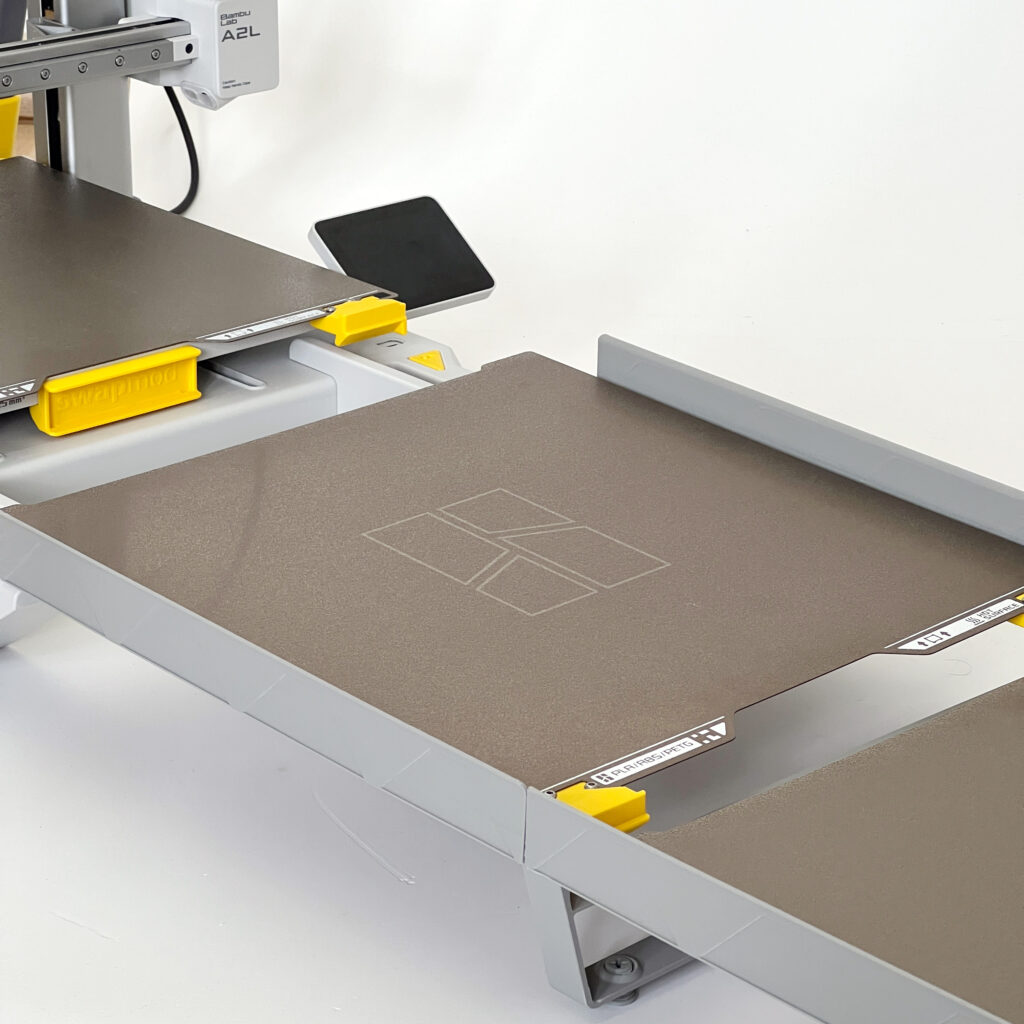
You should avoid plate jams at the ejecting unit. The safest way to operate any plate-changing automation is to use the included rails or a collecting box placed below the level of your printer. This allows ejected plates to easily fall inside the box and out of the way while the next plate is being ejected.
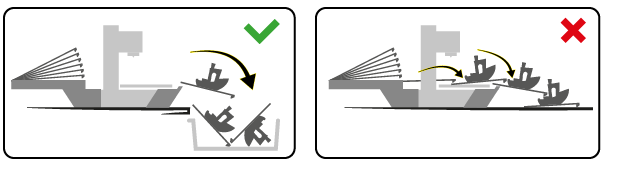
But a better alternative for such big printer as A2L would be using the rails.
Updates and changelog
As the SwapMod design is updated over time, you can find an overview in our swapmod A2L changelog. You don’t need to update it each time a new version is released, as the saying goes, “Never change a running system”. However, it may be helpful to check the changelog periodically in case an update solves an issue you have experienced. Latest version of the files for your swapmod can be downloaded in your personal download area.